Be forewarned…this post is a long one!
So our light situation in the bathroom went from the 1980s “Hollywood” strip light fixture to industrial. I was more than ready to get rid of that thing. However, what I did really like about it was the amount of light it provided, since it had six bulbs. We also had a globe light over the toilet, so that brought it up to seven total.

I knew I wanted to keep the same amount of light bulbs, since we had spent some money changing all of them over to LED bulbs last year. The question was how were we going to be able to do that.
I was eating my lunch in the basement of where I work one day, and realized that I really liked the lighting that was down there. This is what I was inspired by. I started looking for other ideas on Pinterest and loved what I was seeing for exposed conduit lighting. There’s some really cool stuff out there!
I got busy, and started drawing ideas up for what I wanted (BTW, an artist, I am not, so don’t laugh). I knew we could used the electrical box that was already over the toilet, and I knew I wanted to use all seven bulbs. 
Then we used fabric strips to lay it out on the floor, and for our electrician friend, Jimmy, to look at, since he would be installing it. You’ll have to excuse the mess, as it was in the middle of construction. The layout did change a couple of times until we came up with something we thought would work the best. 
After we met at Lowes to get all the parts, we came back home and created a diagram, complete with conduit length measurements. Really, the only requirement that I had was that I wanted one bulb to be in the middle of the mirror when it was done. We did decide the main trunk of the conduit should be bigger to accommodate the four cords that would be at the one end, so we got 1″ conduit for that section, and two octagonal boxes with a 2″ depth.
From there we were able to start putting it together. Jimmy brought his compact band saw, and we laid out the items we needed.
Once the conduit was cut to the lengths on the diagram, they started assembling the fixture.
Double D and Jimmy knocked out the metal tabs where the connectors would be for each conduit pipe, attached them to the boxes, and then connected the conduit. The boxes are used for multiple conductor runs that are split into two or more directions to bring power to a number of lights, in this case.
We got the main trunk line assembled and connected the other parts. The last thing Jimmy did was to use a conduit bender to create a dip for one piece of the conduit to cross the main trunk line. For this piece, we also had to have two elbows to create corners. 
To start painting, we followed the advice of Jimmy, and wiped down all of the pieces with denatured alcohol to get any coating off of the conduit. That way, we hoped the paint would stick well. I then sprayed all of the pieces with Rustoleum’s primer, including the hangers, box covers, and nuts and bolts. I let that sit for a couple of days, and didn’t notice any primer peeling away, or cracking. 
I then gave everything a couple of coats of Rustoleum’s Oil Rubbed Bronze to match the sink legs, and shower fixtures.
Finally, it was install day. Jimmy removed the light fixture over the toilet, and used the wire there to start hooking everything up. Once the first part went up, he did reconnect the fixture so they would have some light in the bathroom while they worked.
The guys then screwed the conduit hangers into the ceiling using the larger size for the 1″ conduit in the main trunk line. 
And started hanging the conduit…

Once the conduit was up they could start with the lights. We purchased seven Hemma lamp cords from IKEA, to go with the seven Ledare LED bulbs we already had. I’m not an electrician, so I’m not even going to try to explain all of the steps that this involved. I do know Jimmy and Double D threaded each lamp cord through to leave about 6″ hanging outside of the ends of the conduit. 
And then somehow connected all seven cords to the main box…
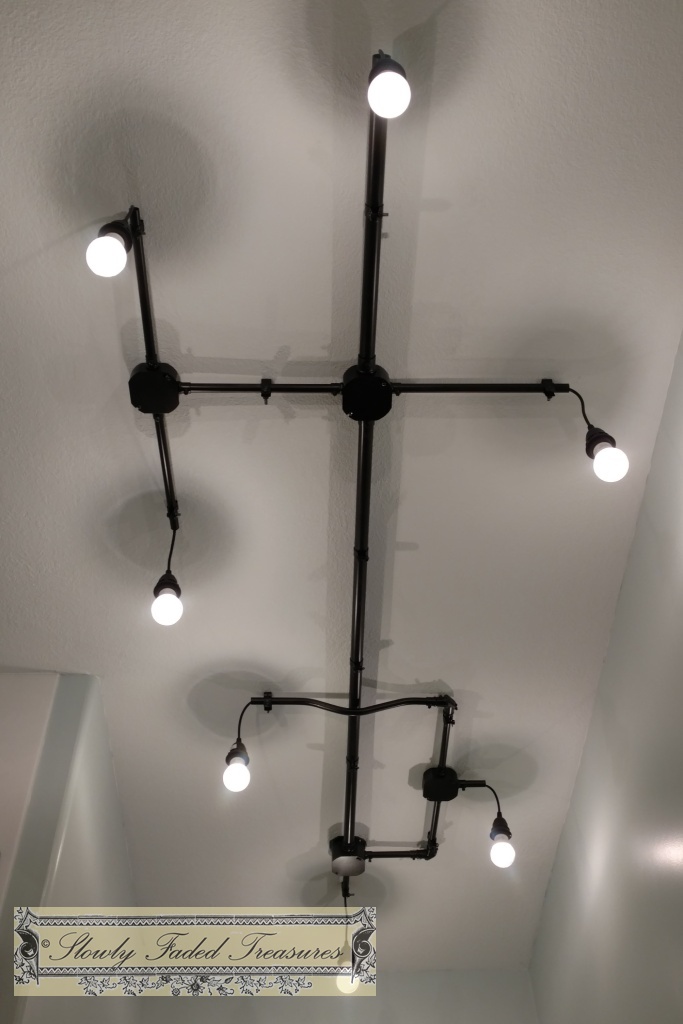
And let there be light! Like a lot of light. I knew it would be a different type of light, since it’s directed down now, instead of out from the wall. You can definitely still see your grey hair and wrinkles though:) 
I did want to show a close up of the bent conduit, and what it ended up looking like. It was hard to tell how it was going to look while it was laying on the concrete in the garage, but I think it definitely gives the fixture character, and I’m glad we went with it. 
I love this last picture of it. I took this by practically laying on the ground under it. I just love how it turned out, and I can honestly say that this fixture is one of a kind. One last step I did was spray some ORB in a plastic lid, and touched up the paint on the hardware and pipe, just wherever they dinged it in the process of installing it. I am a bit worried about the conduit rusting from steam condensation, and I want to make sure I do everything I can to hold that off for a while. Hopefully the paint will help with that!
I have to give big props to Jimmy for being willing to take on one of my crazy ideas, and work with me to get it done. It turned out better than I even thought it would:)
Thanks for hanging in there till the end!
Sarah
Check out the other Bathroom Renovation posts:
Bathroom Remodel: Part 1, Demo
Bathroom Remodel: Part 2, Shower Installation
Bathroom Remodel: Part 3, Drywall and Paint
Bathroom Remodel: Part 4, Luxury Vinyl Tile Flooring
Bathroom Remodel: Part 6, DIY Sink from Typewriter Stand
Bathroom Remodel: Part 7, Mirror and Sconces
Linking up with:
Rustic & Refined

Between Naps on the Porch

Domestically Speaking

Home Stories A-Z

A Stroll Thru Life

Grandma’s House DIY


7 replies on “Bathroom Remodel: Part 5, DIY Exposed Conduit Light Fixture”
That is awesome idea. I love how you created this light fixture. Thank you for sharing at Dishing it and Digging it link party.
Oh my gosh this is amazing! Pinning to my DIY lighting and lamps board! Also, I’m one of the hosts over for the To Grandma’s house we go link party and we would love to have you join us! It starts Wednesday mornings http://www.grandmashousediy.com
Thanks, Tarah! I will definitely join everyone. Thanks for letting me know about it!
Thanks so much for sharing with us at the To Grandma’s house we go DIY link party! You will be featured on my site (www.grandmashousediy.com) tomorrow morning when the next party starts!
That’s great! Thank you! I’ll be sure to check it out.
Great idea, Sarah/I have always liked the lighting in your bathroom/with the new install, you can certainly still see the gray hair and wrinkles, lol/Cool idea/always proud of your creativity and kudos to DD and Jimmy for seeing your visions
This is funny because I live in a basement and came here to figure out how to do the exposed wiring and you’re doing it for decoration